














Last Updated: October 31, 2026
Quick Summary
To tailor a wrap dress for a perfect fit, first diagnose the problem by area: bust gapping, back pulling, a waist that won't sit still, or an uneven hem. Then check your seam allowance and fabric type before choosing a fix such as taking in the sides, adding a hidden snap, or shortening the hem.
- Check seam allowance first: 1/4 inch or less means you can only take in.
- Keep at least 2 inches of wrap overlap at the center front so the dress stays closed.
- Use a stretch stitch or narrow zigzag on knits, since a straight stitch can snap.
- Take in side seams by no more than 1/2 inch per side and try on between passes.
- Test every stitch and marking tool on a scrap before touching the dress.
Table of Contents
- Diagnosing Fit Problems in Your Wrap Dress by Body Area
- Tools, Fabric Types and What You'll Need Before You Start
- How to Fix a Gaping Wrap Dress at the Bust
- How to Take In a Wrap Dress at the Sides and Waist
- How to Adjust a Wrap Dress Neckline Without Losing the Wrap
- How to Shorten a Wrap Dress and Keep the Hem Even
- Fit Checkpoints and Mistakes to Avoid Before You Wear It Out
- Get a Better Fit From Your Next Wrap Dress at Love Salve
- Frequently Asked Questions
Diagnosing Fit Problems in Your Wrap Dress by Body Area
Most wrap dresses that feel "off" have one of a few specific fit problems.
Put the dress on and stand in front of a mirror.
Bust gapping. The wrap opens between the bust and the arm.
Hem that hangs unevenly. Check whether the front points lower than the back.
Once you know which problem you have, choose the right fix below.
Tools, Fabric Types and What You'll Need Before You Start
This guide assumes you already own the dress and want to make it fit. That means fewer pattern tools, more measuring and marking tools, and a clear understanding of how your fabric will behave.
The focused alteration kit
A small kit covers nearly every wrap-dress alteration:
- Seam ripper, the most-used tool in any alteration. Buy a sharp one with a fine point.
- Fabric scissors, reserve them for fabric only; paper dulls the blades.
- Fine silk pins or sewing clips, clips are gentler on knits and silky fabrics.
Add a seam gauge (a small metal ruler with a sliding marker) if you plan to shorten a hem. It costs a few dollars and keeps your hem allowance consistent.
Check the seam allowance before anything else
Seam allowance is the biggest constraint on what you can alter. Turn the dress inside out and measure from the stitch line to the raw edge at the side seam and the waist seam.
- 1/4 inch or less: You cannot let the dress out. Plan every change as a take-in, and leave the existing seam intact.
- 1/2 inch: You have about 1/4 inch of let-out room per seam, which is enough for a small waist or side adjustment but not a full size.
- 5/8 inch or more: You have room to let out seams, which is useful if the dress is tight across the back or bust.
Write the measurement down. It determines which methods below are available to you.
Fabric types and how they change your approach
Fabric choice affects ease, seam choice, and how much you can safely alter:
- Woven fabrics (cotton, linen, crepe, polyester suiting) hold their shape and show every seam line. They are predictable to alter but unforgiving of poor pressing. Press each seam as you sew.
- Knits and stretch fabrics (jersey, rib knit, ponte) forgive small fit errors but can grow out of shape if you pull them while sewing. Use a stretch stitch or narrow zigzag, and stabilize necklines and shoulder seams with a short strip of fusible interfacing.
- Silky and slippery fabrics (satin, charmeuse, viscose) shift under the needle. Baste by hand before machine sewing, use fine pins or clips, and sew slowly.
Test every stitch and every marking tool on a scrap of the same fabric or on an inside hem allowance before you touch the dress. Five minutes of testing saves an hour of unpicking.
Take measurements and write them down
Before you pick up a needle, measure and record:
- Bust at the fullest point
- Underbust
- Natural waist at the narrowest point
Keep these numbers next to you as you work. When a section says "take in 1/2 inch," you will know whether that brings the dress to your measurement or past it. Re-measure at each fitting checkpoint, because pinned fabric can shift as you work.
Set up a fitting station
You will try the dress on many times. Set up a mirror, good light, and a place to pin safely. Wear the bra and shoes you plan to wear with the dress for every fitting. A dress that fits barefoot may hang differently with heels, and a bra change can alter the bust fit by a full inch.
Before you alter a wrap dress, check these key tools and fabric considerations.
| Item | Key fact | Note |
|---|---|---|
| Seam allowance | 1/4 inch or less | Plan every change as a take-in |
| Seam allowance | 1/2 inch | About 1/4 inch of let-out room per seam |
| Seam allowance | 5/8 inch or more | Room to let out seams |
| Overlap at center front | 2 to 4 inches | Most ready-to-wear wrap dresses |
| Flexible measuring tape | 60 inches | Standard length; check it has not stretched |
| Bias binding strip | About 1 1/2 inches wide | Cut on the bias |
| Fabric test | Five minutes | Test stitches and markers on a scrap first |
How to Fix a Gaping Wrap Dress at the Bust
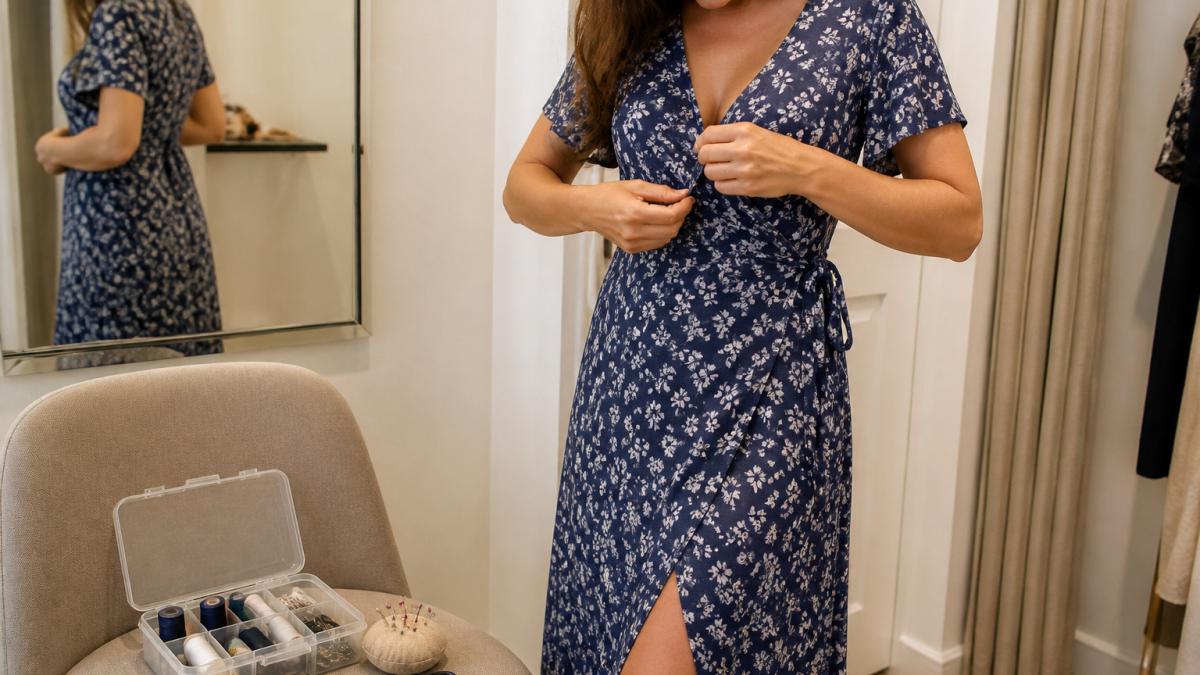
Bust gaping is a common wrap-dress fit complaint, and the right fix depends on your body shape. The fix depends on three things: your bust shape, how much wrap overlap the dress was cut with, and whether the fabric is woven or knit. Work through the diagnosis first, then choose the method that matches your situation.
Diagnose the gap before you sew
Put the dress on over the bra you plan to wear with it and stand in front of a mirror. Pinch the front panels together at the point where they should meet your bust. Note three measurements:
- Overlap depth: How many inches of fabric cross at the center front when the dress lies flat and closed? Most ready-to-wear wrap dresses are cut with 2 to 4 inches of overlap. If yours has less than 2 inches, no amount of taking in will keep it closed when you move.
- Gap location: Does the opening appear at the top of the bust, at the apex, or below the bust? A gap at the top usually means the neckline is too wide; a gap at the apex means the bodice is too flat; a gap below the bust means the waist seam is sitting too low.
- Fabric behavior: Pull the front panels gently sideways. A woven fabric will hold its shape and show a clean fold; a knit will stretch and may recover slowly. This tells you whether you can rely on the wrap to stay put or need a mechanical closure.
Full-bust adjustments
If the dress gaps at the apex and the fabric pulls across the bust, the bodice needs more three-dimensional room. Two approaches work on an already-made dress:
1. Convert the side seam into a dart. Turn the dress inside out and pin a small dart at the side seam under the arm, tapering from about 1/2 inch at the bust apex to nothing at the armhole. Try the dress on inside out before sewing. This removes width without shortening the wrap.
2. Add a hidden snap or hook. For a full bust, the most reliable fix is often a hidden snap at the point of greatest gap, sewn to the inside of the overlapping panel and the underlayer.
Trendsi Versatile Midi Wrap Dress – Floral Periwinkle Quality Apparel for Women →
Avoid the common mistake of shortening the wrap overlap on a full bust. Trimming the front panels reduces coverage and makes the gap worse when you move.
Small-bust adjustments
If the dress gaps because the bodice is too wide and flat, the goal is to remove excess fabric rather than add room. Deepen existing darts by 1/4 to 1/2 inch at the apex, or add two short vertical darts from the waist seam up toward the bust if the dress has no darts. Should the adjustment reveal that the issue stems from the sleeve construction rather than the bodice width, you may need to fix gaping armholes to ensure the garment maintains a clean, professional line against your frame.
Neckline coverage and wrap overlap
If the neckline sits too low or opens when you lean forward, you have two options that do not require recutting the bodice:
- Raise the neckline with a bias binding. Cut a strip of matching or contrast fabric on the bias, about 1 1/2 inches wide, and sew it along the neckline edge, folding it to the inside. This adds about 1/2 inch of coverage and stabilizes a stretching neckline.
- Add an inner modesty panel. Sew a small triangle or rectangle of matching fabric to the inside of the underlayer at the center front, extending 2 to 3 inches above the wrap point. This is invisible from the outside and keeps the neckline closed.
Do not take in the bust area so much that the wrap no longer crosses cleanly. Keep at least 2 inches of overlap at the center front so the dress stays secure when you sit, reach, and move.
Fabric-specific notes
- Woven fabrics (cotton poplin, linen, crepe) hold a seam and show every stitch line. Use a fresh needle, press each seam as you go, and test on a scrap before sewing the dress.
- Knits and stretch fabrics need a stretch stitch or narrow zigzag. A straight stitch will snap the first time you sit down. Stabilize the neckline with a short strip of fusible interfacing before binding so it does not grow.
- Silky or slippery fabrics are the hardest to pin. Use fine silk pins or clips, and baste by hand before machine sewing to prevent shifting.
Once you have made your adjustment, try the dress on and raise your arms, sit down, and lean forward. The wrap should stay closed through all three movements before you call the fix finished.
How to Take In a Wrap Dress at the Sides and Waist
When the dress is loose through the waist or sides, taking it in usually solves the problem. Work slowly and try the dress on often.
- Put the dress on inside out and pin the side seams to the fit you want.
- Check that the waist tie still sits at your natural waist.
- Sew a new seam, keeping the original seam allowance intact.
- Trim the excess fabric, leaving at least 1/4 inch.
- Finish raw edges with a zigzag stitch or serger.
Stretch knits need a slightly different approach. Use a stretch stitch or a narrow zigzag so the seam can flex with you. A straight stitch can snap the first time you sit down.
How to Adjust a Wrap Dress Neckline Without Losing the Wrap
Neckline changes need care because the wrap has to keep its shape. The neckline is also where the fabric is most likely to pull or gape.
Pin the neckline first, then try the dress on and check how the wrap lies.
If the neckline is too high or too tight, you may need to trim the top edge slightly. Take only a little at a time.
How to Shorten a Wrap Dress and Keep the Hem Even
A wrap dress with an uneven hem looks off right away. Fixing it takes patience, but it is straightforward.
Put the dress on wearing the shoes you plan to wear with it. Have someone help you mark the hem, or use a mirror and a yardstick.
Fold up the hem along your marked line and pin it. Try it on again.
Fit Checkpoints and Mistakes to Avoid Before You Wear It Out
Before you wear your altered dress, run through these checkpoints:
- The wrap stays closed when you raise your arms
- The waist tie sits at your natural waist
- The neckline lies flat and doesn't gape
Common mistakes to avoid:
- Cutting before you test the fit
- Taking in too much fabric at once
- Using a straight stitch on stretch fabric
Once you've checked everything, wear the dress for a short test period around the house. Movement reveals problems that a mirror check misses.
Get a Better Fit From Your Next Wrap Dress at Love Salve
Knowing how to alter a wrap dress is useful, but starting with a dress that fits well saves time.
Our Trendsi Chic Floral Wrap Midi Dress is made from 100% polyester and features an adjustable wrap design with a waist tie. Shop the Trendsi Versatile Midi Wrap Dress here.
If you want a knit wrap-style piece, our Ribbed Cross Wrap Sweater is an option to consider. Browse the women's knit wrap sweater here.
Frequently Asked Questions
How do you make a wrap dress fit better?
Start by identifying where the fit is off: gaping at the bust, pulling across the hips, or a waist tie that sits too high or low. Most wrap dresses that feel wrong can be improved with small changes. Taking in the side seams by a quarter to half an inch often tightens the waist, while adjusting the wrap overlap or the tie position changes how the bodice sits. Always pin first, try the dress on, and only then stitch. Working in small increments protects the fabric and keeps the fit correctable.
How do you stop a wrap dress from gaping at the bust?
Gaping usually happens when the wrap overlap is too short for the bust, or when the bodice is too wide at the front. You can often fix it by moving the wrap point or tacking the inside overlap to a small fabric tab or a hidden stitch at the underarm. Another option is adding a bust-line fabric tack on the inside, which holds the layers closed without showing on the outside. Check the fit while standing, sitting and reaching, since gaping often appears only in motion.
Can a tailor alter a wrap dress?
Yes. A tailor can take in side seams, shorten the hem, adjust the waist tie and rework the neckline. Bring the shoes you plan to wear with the dress, and ask the tailor to check the fit with the tie tied in the position you actually wear it.
How tight should a wrap dress be?
A wrap dress should lie smoothly across the bust and back without pulling at the buttons or seams, and the wrap should overlap enough to stay closed when you move. The waist tie should sit at your natural waist and tie comfortably without digging in. If you can pinch more than a finger's width of extra fabric at the side seams, the dress is probably too loose; if the fabric pulls in horizontal lines across the bust or hips, it is too tight.


